Monday, 21 May 2018

I'm 'Seriously On Point' for Scrap Matrix

Good morning my lovelies
 
It's my turn to share the layout I created for our current 'The Point Is' Challenge over at Scrap Matrix.
 
Here it is.....


A fun layout with photos taken just prior to my girl hopping on stage and performing a Hip Hop Routine.
 
I wanted to capture the 'teenage attitude' so I selected bright colours, funky stamps that look like hand drawn doodling. I felt the 'pointy' theme was perfect for this age group.
 
 
 To go with the theme I went with the title 'Seriously On Point'. LOL
 
 
 So I began by selecting a sheet of 7Dots Paper for my background.
The paint splatters were perfect.
 
 
I swiped them randomly across my page using an old store card.
 
 
 I then added some Dina Wakley Washi Tape in a chevron pattern.


I love this stamp set by Paper Artsy and knew it would be perfect for this layout.
I used the 3 arrow sets on the bottom right hand side and the file tab stamp and some lettering.
 
I can see this being a very handy stamp.
 
 
 I  stamped the arrows onto the layout, ensuring they faced towards where I was going to add my photo. This draws the eyes into the photos and ensures the focus is on them.


I then pulled out a paper I had created a few weeks ago - my first play with the Gelli Plate!
I'd used a cool 13Arts stencil with lots of triangles.....perfect, and I knew the colour would make the page pop.
I achieved the colour using Paper Artsy 'Tracy Scott' Paints.


I then cut out some taggy bits and also used the file tab stamp and cut this out too.
 
 
 I then placed my photos down, and began tucking in the above items.

I made my own tags from the 6x6 Paper Pad. which I also tucked around the page.


I then added a few embellishments from the Paint Chips range.....arrows, word stickers etc.
 
 
 The final touches were to add the title from the Mambi Chip Stickers.
These have really been turning up on all my layouts!!
 
I simply wrote on an embellishment for the rest of the title.
 
 
Oh yeah, I nearly forgot, I swiped black paint around the edges to completely finish it off and added a few splashes of paint.
 
 
Here's a bit of a close up.....I love how the various arrows/points look like I've drawn them on.
These stamps print so very quickly.
 
 
Fun, vibrant and ON POINT! Lol


 So that's it from me today!
 
I'd love you to join in with our challenge this month....
 
It's super easy, you don't even need a blog!
Just head to our Scrap Matrix Shares Page and pop it in the correct album.
 
The only rule is that you MUST use some Scrap Matrix products!
But hey that's super easy.....all my layouts are covered in them.
Just let us know which products you used in the comments.
 
That's it!
 
 
Here's a list of Scrap Matrix Products I used:
 
Tracy Scott Paints

Monday, 7 May 2018

Tam's latest addiction.....Round 2

Hi there arty friends,

I'm back to share Round 2 of my latest addiction.....Art Journaling.

I know it's been around for a while, but it's only recently I decided to try it out.  You can read about Round 1 HERE.

So let's get straight into it.....


For this one, I'd just returned from a trip to Phuket so this quote really spoke to me. I'm loving that this is a place to put some of my favourite quotes, it will just be so inspiring when finished, full of colour and inspiring words.....perfect to flip through when I'm feeling a bit flat and need some extra inspiration.

I used Tracy Scott's Paint Set (love) and a Donna Downey Stencil and a 13 Arts Scale Stencil.


This one was created using Dina Wakley paints in 'Ocean' 'Lime', 'Magenta' and 'Lemon'.

I created the feathers with a Kinder Kreations Feather Stencil. I love that you can layer them. I love that the two sides to the stencil work together so well.


I also used the xoxo Stencil by 13 Arts and black gesso.


For this one I again used Black Gesso, and Dina Wakley paints.

I stamped using stamps by ALL & CREATE #10 and 7Dots Dreamscapes, and then I had fun
doodling.


This one became a bit of a mess, so I just went with it and added a quote that suited......it reads
 "Art has something to do with the achievement of stillness in the midst of chaos".

I used White Gesso, Black Gesso, Dina Wakley Paints, which I used in the background and also to swirl directly onto some of the circles.


For this one I used Dina Wakley's  'Lime' and 'Ocean' Paints, some black gesso and a stencil from my stash.

I was inspired by the colours of Phuket for this one. Love those colours together.


This one was created using the same stencil from my stash, but I used Dylusions paints in "Bubblegum" and "Squeezed Orange". 

Again inspired by Phuket colours.

I doodled using a Black Fudeball Pen.


For this last one for now, I used Dylusions Paints again, and just doodled.

I'm loving the process.

I love that I can whip out a page very quickly - I'm hoping it will make me play every day, but I'm not fussed if it doesn't.
It's something I can pull out and play with when I'm feeling like I've lost my mojo.
I'm also loving that it's a place I can experiment in, doodle in, paint in. Sometimes with layouts, I lose my nerve to JUST PLAY.  I hold back more.

Well that's it for Round 2.

I'm back to being busy at work for a few weeks, so Round 3 might take a little longer.

Happy PLAYing!

xxx

Sunday, 6 May 2018

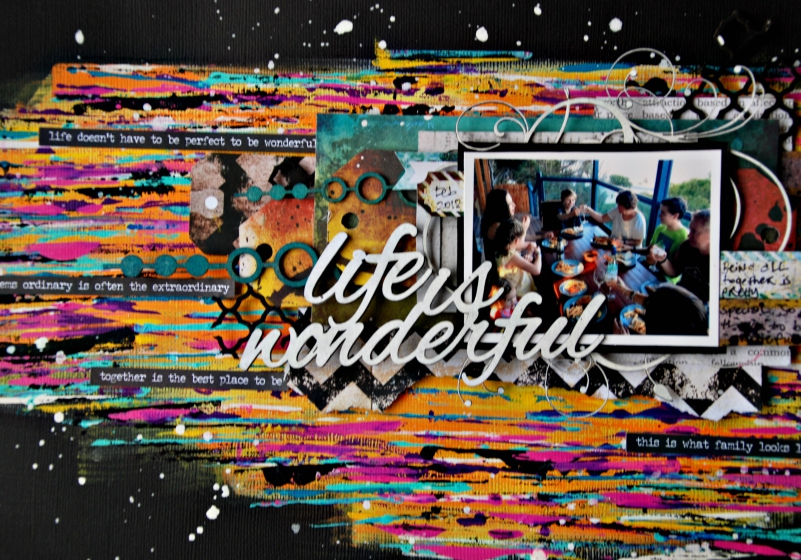
"Life is Wonderful" by 2Crafty Chipboard

Hi there, today I'm sharing my latest creation for 2Crafty Chipboard.
 
 It's titled:
 

"Life is Wonderful"


A layout that celebrates a recent weekend away at the beach in an amazing house.
The best thing about it was that we were altogether..... you see we live across the other side of the world from each other so having 3 generations hanging out in one place was extra wonderful, and doing some of those everyday things together meant the world.


I used the following 2Crafty Chipboard on this one:
 
'Life is Wonderful' title
'Jenna's Frame'
'Beaded Hanging Heart Set'
'Moroccan Bits'


I painted both the 'Jenna's Frame' and the 'Life is Wonderful title' in a couple of coats of white gesso, and then some white acrylic paint.
 
 
As the background was filled with so much colour, I felt the white was grounding as well as being a great contrast against the black background.
 
 
I just love the script font for the title.
It's perfect for sitting on top of photos!
 
 
Between all the layers, I added in some 'Moroccan Bits'.
I painted them in black paint to go with the background.
I love the texture this gives to the layers.
 
 
I then added a teal colour ink to the hanging part of the 'Beaded Hanging Heart Set'.
I removed the heart and turned them on the side and added them in to the layers, to create extra interest.
I really like how the circular shapes contrast well with the painted straight lines on the background.


Love all the glorious colour combined with the black background!!
Makes my heart happy!
 
 
So that's it from me today. 
I hope you make the time to do something creative that makes your heart happy.


Wednesday, 2 May 2018

Tammy gets the BLUES.....

Hi there. I've popped in to share my latest for Scrap Matrix.

This one has been created for the current Monochramatic/Tic Tac Toe Challenge, which basically means create something with only 1 colour plus neutrals PLUS select a line from a grid and ensure all these things are on your page.

This time I went with BLUE!!

 
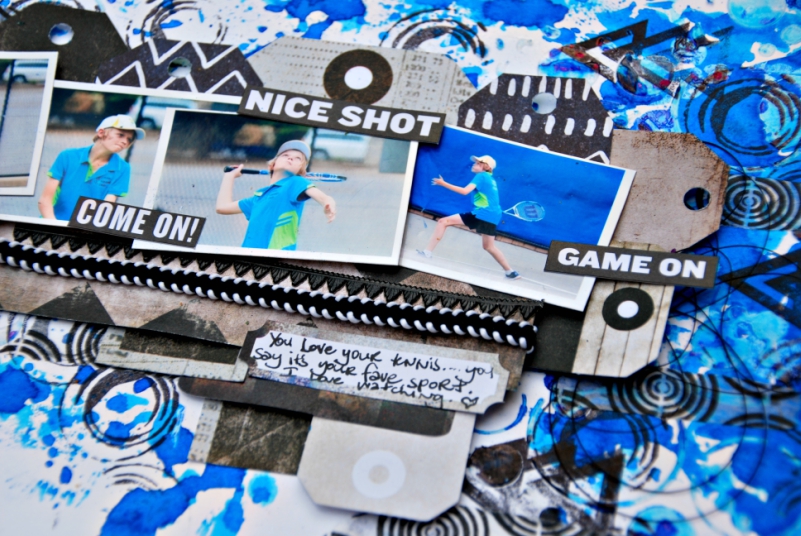
The perfect colour for my son's tennis photos!
 
 
I used the line that runs vertically through the centre:
Stamp (lots of them)
Big Title (Love those stickers!)
German Scrap (appears on most of my layouts)
 
 
So let's have a quick look at how this came together.....
 
I began with a sheet of Marshmallow Cardstock - just love this cardstock....it just takes mixed media so well!!
 
I added some 3D Gloss Gel in transparent using a cool 13Arts Bubbles Stencil in
I went with this stencil as all the circles reminded me of tennis balls.

 
Once this was dry I added some Dylusions Ink Spray in 'London Blue'. 
I did this in two different ways.
 
The first way was to use what I like to call the 'packaging splodge technique'. 
Just take some old plastic packaging, spray the Ink Spray directly onto it, also spray on a little water, then turn it over and 'splodge' it onto your cardstock.
Really technical right?
It does give a lovely effect though.  I use it all the time.

 
The second technique is to open the lid on the Ink Spray and paint it on with a paintbrush, similar to applying watercolour paint, but so very vivid!!
 
I can't stress enough the cardstock being a secret with this.
If you use normal cardstock or paper, you may need to apply clear gesso first or it will ruin your paper.

 
I then grabbed one of the AALL & CREATE stamps.  I selected this one, again because of the circles reminding me of tennis balls.
 
I stamped this randomly onto my background using Ranger Archival Ink in black.
 
I then added a stamp from 7Dots Studio - Dreamscapes. I love that chevron, arrow shape.  I use it often, particularly when scrapping my boy!
I was a little more strategic with my placement of these as I wanted them to point inwards to the layout, as this helps guide the eyes into the layout, and in particular, draws attention to the photos.

 
I then added some Washi Tape by Dina Wakley.  I again selected more circular shapes.
I found the tape a little wide on my layout, so I tore it roughly into narrower strips and applied these quite randomly.
 
 
I then laid out my photos.  I ensured these all overlapped as this draws they eye in and helps to tell the story within the photos better.
I then focused on adding lots of 7Dots Studio tags and stickers around/behind the photo cluster.
I adore these tags, and use them ALL the time.
 
 
I finished off with some ribbon, some German Scrap, a few word stickers and of course the 'LOVE life' title.


I often scrap with just 1-2 photos, so was happy to use a sequence of 4.  I felt 4 told the story better.
When using multiple photos, it's important to cluster them together.  Otherwise it can become confusing for the brain, not knowing where to settle and where to focus.


I also believe repeating a shape - in this case circles, helps to 'ground' the layout and gives a common thread.  Otherwise the layout would be overwhelming and confusing.
(Note the circles repeated in the tags too).
 

Don't forget to add a little bit of journaling to your layout to totally finish it off. 


There you have it!
 
As you know, if you follow my work or Scrap Matrix,  I love using colours in my layout. The brighter the better.
At first this can be overwhelming.  I truly believe having a go with 1 colour, plus black and white simplifies the whole process.  It still gives stunning results, and can be a really great way to step into the amazing world of colour.
 
So why not give it a go?
With the challenge on this month, it's the perfect opportunity to do that.....so pick a colour, and a line from the above grid and give it a whirl.
 
I'd LOVE to see what you do, and believe me, it's wonderful to know that your work has inspired somebody to create, so don't forget to upload it into the Scrap Matrix Shares Page.  Just find the correct album - pop it in, and let us know which products from Scrap Matrix you used in your creation.  You have until the 14th of May to do this.
 
Well that's it from me, I'll be back again soon......


Marshmallow Cardstock
7Dots Studio Dreamscapes Stamp
Black and White Ribbon


Tuesday, 1 May 2018

Scrap the Girls May Challenge

Hi everyone, so we are heading into May, that's just CRAZY!!

So a new month means a new challenge and at Scrap the Girls this month it's all about birthdays.......


So fun right??  This moodboard is a theme board - so you don't have to use the colours, as long as your layout is about girls and about birthdays.

Here's my take on it.....


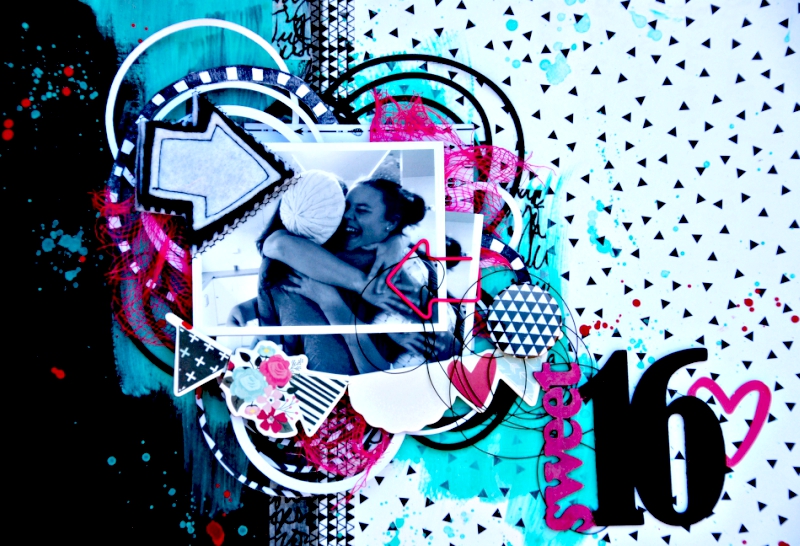
I just love these photos taken of my beautiful girl - her friend's surprised her with a party and this is the moment just after she walked in.  I love the expressions, the emotion and also I really wanted to capture this moment forever, as at 16 your girlfriends are a HUGE part of your life.


My title came from 2Crafty Chipboard - I love painting the fonts different colours.

I also used lots of yummy goodies from Scrap Matrix - where I get most of my scrappy supplies from.  The paints, the washi tape, the cool Paper Artsy Stamp.

I love all the circles underneath my photos. As well as the stamp I created these using a Uniquely Creative Die - Interlocking Scribbles Circle Die.  It just cuts so cleanly.


I selected the colours as they felt very 'teen' to me, and also the paint gives it a funky feel.


This month our sponsor is Cocoa Vanilla! I just love their ranges, and they are Aussie!!


Can't wait to see your entries. Make sure you pop over to our BLOG to see the other DT's inspiring birthday layouts.......

See you soon!