Wednesday 26 December 2018

Merry Christmas!!! A magical layout for 2Crafty Chipboard

Merry Christmas to you all!!!
 
I really hope this one is magical and full of joy for you all.
 
I'm here today to share a Christmas Day layout for 2Crafty Chipboard.


 It's titled:
 

'The Magic of Christmas'


The inspiration from this layout came from the current challenge over at 7Dots Studio:


I used the colours as my starting point.
 
I was also inspired by the Christmas Tree, the lights, the pinecones.
So much inspiration!


 I used the following 2Crafty Chipboard:
 
'Winter Twig Branches'
'Pine Needle Wreath'
'Flourish Adornment Set 4'
'The Magic of Christmas Title'


I added ink to the title 'The Magic of Christmas'.


I just love the script style, and decided to use two different colour inks.
I love how this looks.


I added white acrylic paint to the 'Pine Needle Wreath'.
 
So simple, yet effective.


I added white acrylic paint to the 'Winter Twig Branches', but then stamped them with a script stamp and black ink.


I also used this stamp in the background of my layout.
 
I love tying elements like that together.


I added some brown ink to some of the flourishes in the 'Flourish Adornment Set 4' pack.
 
Such a lovely effect - I love the earthiness, and the rustic feel this creates.


I love this time of year.
 
The light, the magic.
 
I love it all.


That is it from me for the year!
 
I've loved sharing with you throughout 2018 and can't wait to inspire you with some more creativity in the New Year.
 
Until then, have a wonderful Christmas.
 
I wish you love and light.
 
Love Tam
xxx


Wednesday 12 December 2018

My favourite Art Sisters

 
I'm back today to share another take on the current 'Colour Wheel Challenge' for Scrap Matrix.
 
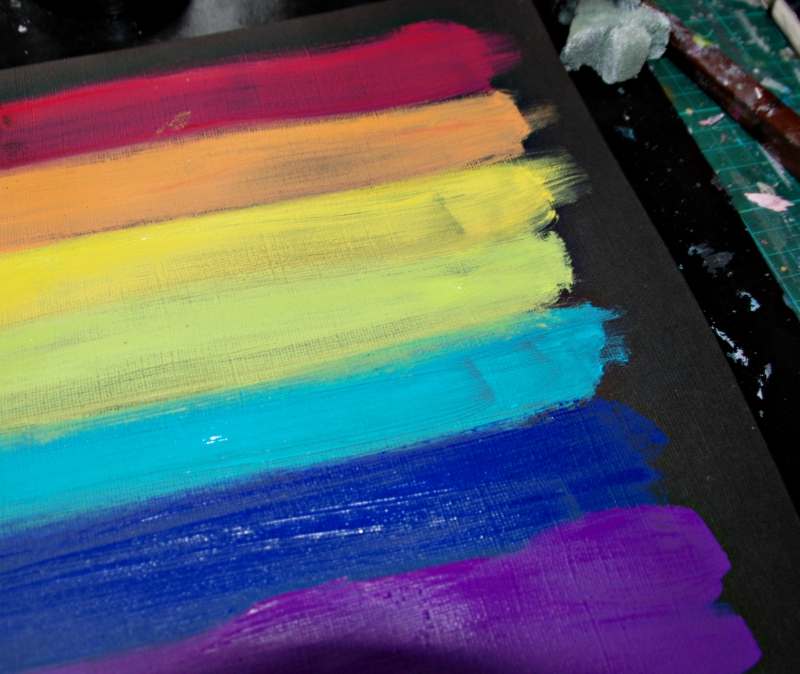
Last time I went with a rainbow effect on a white background, so this time I decided to go with a rainbow effect on a black background.

 
Love the vibrancy!!
 
You can see I've changed it up a little from last time.
I decided to have fun with one of my recent stencil purchases!!
LOVE IT!
plus I wanted to use Dylusions paints instead of the Ink Sprays.
A totally different finish, but still with the gorgeous bold, vibrant colours that I love so much about Dylusions.


So let's get started.......


I began with black cardstock....if you are an art journaller, you could just add black gesso to your background first.
 
Look at all those lovely colours!!


I began by just painting the colours directly onto the cardstock....the only real rule I followed was to follow the rainbow pattern. (ROYGBIV)
 
I used the following colours (in order)


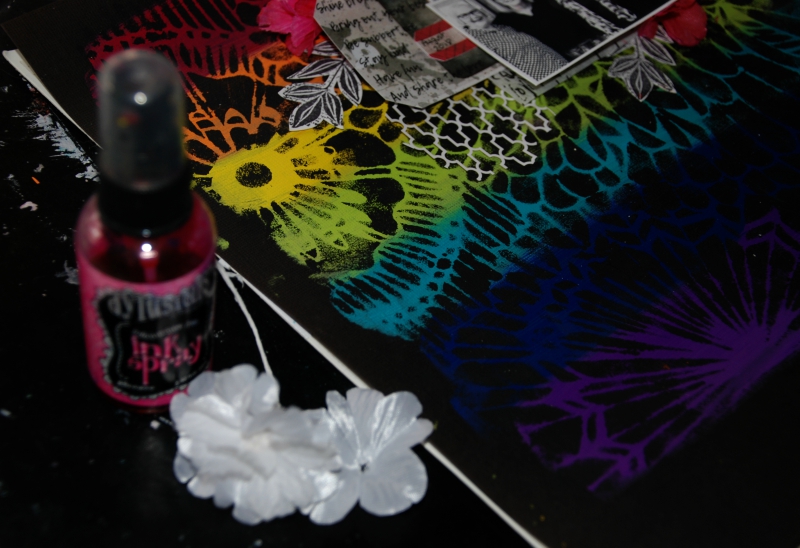
 I then added a stencil by The Crafter's Workshop in a 12x12 size - there are so many that you could do this with....and they'd look amazing.
 
I then applied black gesso using a sponge.......


The effect is just awesome, and I love that by using black gesso onto black it gives the illusion that you have painted the detail in colour.
 
Very tricky and super easy.


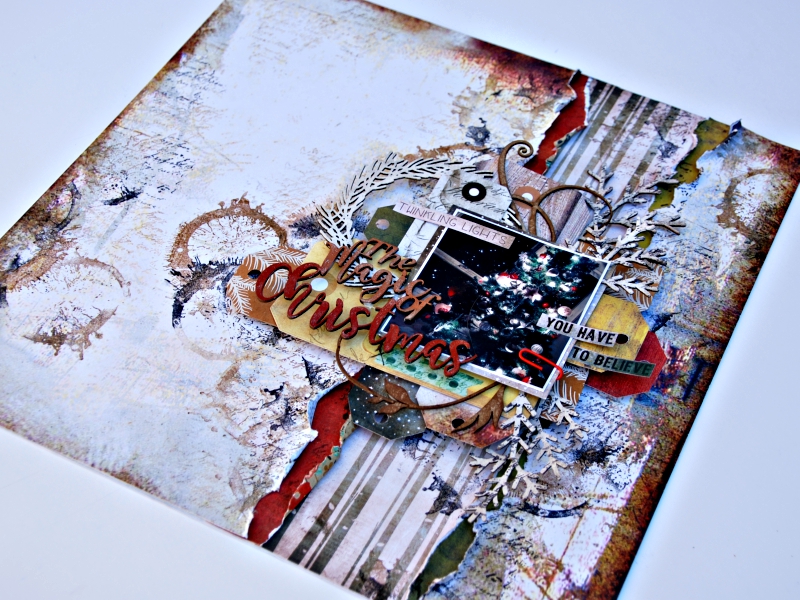
Now it's time to work with my photo and layers.
 
I cut up some of this die cut paper which comes from a Heidi Swapp pack. It has some gorgeous designs in it.....
I used this as a base to my photo and the other elements.


As I was scrapping some of my fellow Design Team members, from the weekend we had at Victor Harbor for the fabulous Tracy Scott classes, I saw a couple of quotes from this 13Arts Sticker sheet and just knew they'd be perfect!


I grabbed a 7Dots Studio tag and cut it in half and added it behind my photos. To one side I added this gorgeous quote, which really sums up how I feel about the Scrap Matrix Design team...actually not just the team, but everyone who shares and inspires within the Scrap Matrix Shares group.
You all bring joy and light to my life.
 
I am blessed to be a part of the Scrap Matrix family.


I then added 'Art Sisters' sticker to the other side of the tag, and added a Heidi Swapp epoxy word above it to complete my title.


I wanted to add a bit more colour to the cluster, so I grabbed some white flowers and spritzed them with Dylusions Ink Spray in bubblegum pink.
 
I then poked these underneath the photos.


I stamped some of my new Carabelle stamps onto white cardstock.  Love these leaves - I then cut them out and poked them amongst the flowers.


You may be able to see in the cluster that I also added some Dina Wakley tissue paper.
 
I love adding this to my layouts, it provides another texture.


There you have it!!
 
When you have ALL that gorgeous colour going on, you can keep some of your layers a bit simpler. I really only used black, white, pink and a splash of turquoise in the cluster.....I wanted the rainbow background to be the hero.


Are you entering our challenge this month?
I sure hope so....it's one of my favourite boards that we've had so far.
I'm really looking forward to what you create.
 
Remember it's very open to your interpretation. You could create a layout, some cards, a canvas, a gift for someone for Christmas, and of course an Art Journal page.
 
Just be inspired by this image and then load your entries into the corresponding album over at the Scrap Matrix Share Group.  No need to have a blog. So easy!
The only rule is you must use at least ONE Scrap Matrix product...or you can be like me and use LOTS!!!
 
You have until the end of December, and you could win a voucher to Scrap Matrix store (wouldn't that be the best Christmas present!), and you could nab yourself a Guest Design spot.
We'd love you to come play with us!


Thankyou so much for being here, and for cheering me on all year. You can always head to my BLOG if you'd like to see more.
 
I've loved inspiring you throughout 2018, it's one of the highlights of the year for me. I look forward to continuing that in 2019.
 
Wishing you all a magical and light filled Christmas!
 
Luv Tam
xxx


Scrap Matrix Products used:
 
Black Bazzill

Friday 7 December 2018

Opening presents......for 2Crafty Chipboard

Hi there, I've popped in today to share a Christmas inspired layout for 2Crafty Chipboard.
It's titled:
 

'Opening Presents'


I had so much fun creating that Christmas wreath.
 
I used the following 2Crafty Chipboard pieces:
 
'Opening Presents Title'
'Corner Sweet Holly'
'Frame Viney Circles'
'Corner Holly Vines'
'Tiny Hearts and Stars'


I absolutely adore this time of the year.
 
Everything about it is magical!!


This month 2Crafty Chipboard is sponsoring the fabulous CSI Challenges.
 
I solved Case No 267......


I was inspired by the gorgeous colours of the Scene and also the whimsical feel.
 
I had so much fun solving the case and used lots of the clues - dots, Christmas/holiday, tags, stars, animals (birds and deer), garland, stamps and string.
 
You can head to their challenge site HERE to see the list of clues.


I began by applying white gesso to ALL of the chipboard.
 
I then added white acrylic paint to everything too.
 
I trimmed down the 'Frame Viney Circles', 'Corner Sweet Holly' and the 'Corner Holly Vines'. I needed them to fit into a circular shape as I wanted to create a Christmas wreath.
 
I then applied watercolour paint to various individual pieces, just to highlight some of the beautiful elements of the chippy - so fun!


Just look at those gorgeous 'Corner Sweet Holly' pieces, with the holly and the birds!
 
Super cute!


I added a few of the stars from the 'Tiny Hearts and Stars' Pack, to give a touch more of that gorgeous blue colour.
 
I just popped them in here and there.


For the 'Opening Presents title', I heat embossed it with white emboss powder, just to give a slightly different finish to the other pieces.


I added some pen marks to some of the holly, and also added a gorgeous new Clarabelle Stamp available from Scrap Matrix.

The perfect way to finish off the wreath and add to the whimsical feel of the layout.


That's it from me today, enjoy this magical time of the year, and I will see you a bit later on with another creation.