I was pretty excited to receive this month's 'Mixed Media Kit' called 'Doilies' by
Uniquely Creative in the post and when I opened it I may have squealed!!
It has a real Mandala vibe to it!
Yippeeeee
I created three layouts.....
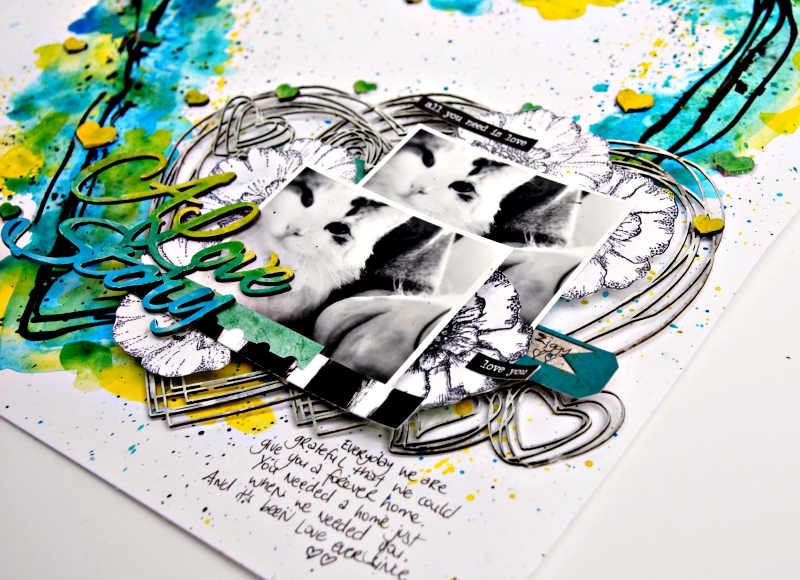
For my first one I just had to do a dreamcatcher with feathers.
I painted the wood veneers with
watercolour paint and added some dots using a black journal pen.
I added more feathers. Those rainbow ones were cut using the Uniquely Creative Metal Die Set called
'Sketchy Feather Trio Set 1'. I then added some
watercolour paint and let them 'bleed' together a little. The black and white ones were also cut using the Metal Dies, and finally I added in a few real feathers too.
See the little dots behind the feathers? I created those with the 'Dot Fade Stencil' from the
Kit. Just added them by rubbing paint through the stencil in a line.
I also used the smallest 'mandala/flower' shape from the 'Doily Stamp' Set in the
Kit to create some lines too.
I used the wood veneer from the
kit for my title, adding
watercolour paint in a rainbow effect, again letting it bleed into each other.
For the journaling I used the word quote from the 'Doily' stamp set in the
kit. - I blocked out a couple of the words with washi tape, as I wanted to alter it a little.
For the centre of the dreamcatcher, I stamped and cut out some of the Mandalas from the 'Doily' Stamp in the
kit in various sizes.
I layered these around the edge of the photos, and then added some of the 'Word Strips' from the
kit on top.
I really love how this turned out!
Now for my second creation.....
A layout about last year's Phuket trip.....those Doilies/Mandala's just reminded me so much of the place, I just had to use them.
I created the background using white texture paste and the 'Doily' Stencil in the
kit.
I cascaded it down the page and once dry I added some of the
Uniquely Creative Watercolours.
Such a cool effect.
I then stamped and cut out Mandalas in various sizes from the 'Doily Stamp' in the
Kit and added the
watercolours to these too.
I added these using foam tape for dimension, and again cascading them down the page and around the photos.
I added some of the 'Word Strips' from the
kit and then used a Metal Die called
'Scripty Sunshine' to create the title.
Some journaling, and paint flicks and it's done!
Ok, let's take a look at the final layout.....
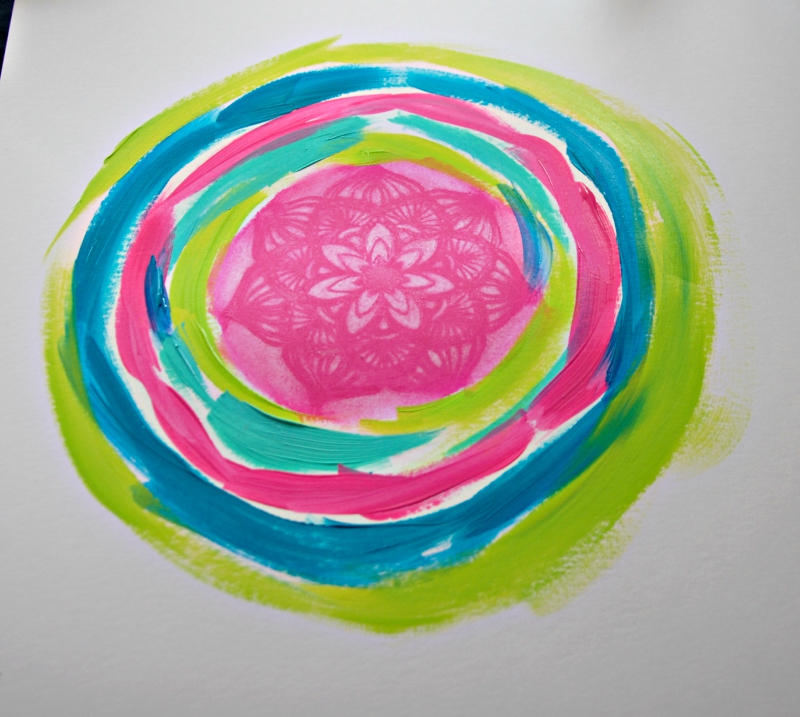
Look!! I created a giant Mandala Tam style - colourful and messy!
I began with some white cardstock.
I added a circular shape using pink paint. I used Dina Wakley ‘Magenta’.
I then placed the 'Doily Stencil' from the
Kit onto this whilst the paint was still wet and using a baby wipe, wiped away the paint through the stencil.
I then added painted circles around the edge of this, and
just let it grow bigger. I tried not to
overthink this part, just get the paint on – I’m not striving for perfection –
I want it to have an arty look. I also
didn’t let it dry inbetween changing colours.
I used Dina Wakley Paint in ‘Magenta’, ‘Turquoise’, ‘Ocean’ and ‘Lime’.
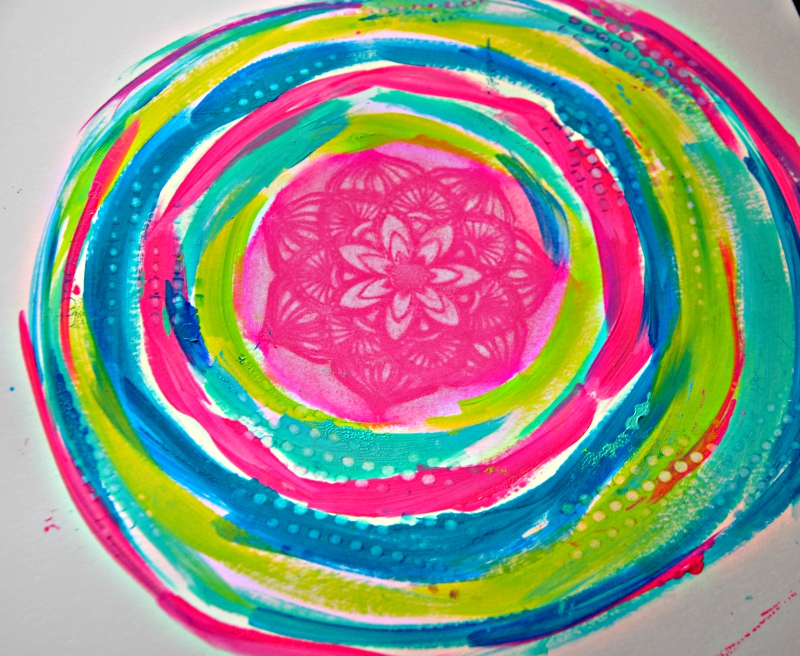
Working quickly, whilst the paint was still wet, I rubbed a
baby wipe through parts of the 'Dot Fade Stencil' from the
Kit and lifted some of the colour.
I then added some Dina Wakley ‘Black’ Paint in swirls,
again, the messier the better!
I added some doodling with a black pen (dots, scribbles),
and then used the smallest mandala shape from the 'Doily Stamp' in the
Kit to create
some circular patterns.
I also stamped one of the doily shapes from the 'Doily Stamp' into the very centre using black ink.
Time to move on to the photos and the layering.
I stamped a few of the ‘Mandala Stamps’ from the
Kit onto white
cardstock. They just stamp beautifully,
perfect every time!
I cut these out and added them behind my photos.
I also made some tags and embellishments from some of my
paper scraps and added these in too. They looked great when I added some of the 'Word Strips' from the
Kit.
The quote on the blue tag comes from the ‘Stamp Set’.
I poked some netting/bandage around the photos too and then
added all this using foam tape to lift it up off the background.
I finished it off by journaling around the outside edge of
the painted Mandala.
Wouldn’t this look great in other colour palettes?
I’d love you to give this a go….you never know you might
actually get it more even than mine! Mine is a little lopsided but I am NOT a
perfectionist, so I’m ok with that.
This month’s
Mixed Media Kit by
Uniquely Creative is absolutely stunning and you
will have so much fun with it. I sure did!!
It's only $21.00 for all of the above and includes 2 stencils, 1 stamp set, 1 word die cut sheet, 1 wood veneer set containing a title and some feathers plus loads of ideas and inspiration in the little mag.
You can order it
HERE
See you again soon
xxx