Monday, 27 August 2018

A Magical 2Crafty Chipboard Layout plus VIDEO

Hi everyone, I've popped in today to share some more 2Crafty Chipboard goodness with you all.
 
This one's titled
 

"Magical"


A page telling the story of a recent fancy dress party.
 
I love the bright bold colours against the black.
Yep, surprise surprise, this page has bold colour!!
 
I guess it's my signature style, but the photo and theme really called for it.


I used the following 2Crafty Chipboard on this page:
 
"Grid Bits"
"Fine Word Set 2"
"Lina's Swirl"
"Element Set 1"
"Starbright Snowflakes"


I began by painting all of the chipboard, except for the title in a few coats of white gesso.


I applied white acrylic paint to the "Grid Bits" and the "Lina's Swirl".
 
I knew these would pop against the black background and bold colours.
 
 
I tucked "Lina's Swirl" underneath my photo, and the "Grid Bits" underneath all the layers.
 
 
To the "Starbright Snowflake", I added a variety of Dylusions Ink Sprays.
 
Instead of spritzing them on, I applied them direct with a paintbrush.  This gives a more concentrated colour.
 
I layered the colours as I really wanted to create an ombre look that complemented the background.
 
I used the colours "Fresh Lime" and "Polished Jade".
 
 
I also used this technique on the "Elements Set 1"
 
I really love the Moroccan feel of both the shape and the effect I achieved on the chipboard.
It really helps to 'tell the story'.


I tucked both of these pieces amongst the layers.


Finally I added black gesso to the "Magical" Word from the "Fine Set 2".
 
I laid these down the side of my photo.


I have created a video of the layout so you can see it all come together.
 
You can see EXACTLY how I created the gorgeous painted background, and also how I created the ombre finish on the pieces of chipboard.
 
Hope you enjoy it!!


I'd love you to subscribe to my you tube channel.  To do this go HERE.
I'm really hoping to create more videos.

Wish me luck!

Until next time, happy creating you beautiful people!


Sunday, 12 August 2018

Another Aall & Create Inspiration for Scrap Matrix

I've popped in today to share some more ALL & CREATE inspiration for my favourite scrappy store Scrap Matrix.
 
This time I scrapped myself!! I know, I know something we all forget to do, or dislike doing. BUT I urge you to get on the other side of the camera and include YOU in your beautiful creations.

 
Love the bold colours on the black background.


Let's have a look at how this layout came together. 
 
I basically used the same technique for the background as I did last time for my teen boy layout.  If you missed it you can find it HERE.
 
This time around I decided to use my Tracy Scott Paper Artsy paints....... perfect timing as we have the fabulous Tracy Scott coming to teach at Scrap Matrix later in August!!! Woohooo!!
How cool is that!! As I'm feeling all Tracy inspired, I grabbed her beautiful paints. Oh those colours!!!

 
Just love them!!! 
I didn't use the Peacoat (navy) on this layout as I had black as my base instead.


So I painted them quite randomly on my background paper. 
 
This time I didn't prepare the bazzill first. As I wasn't using a lot of water, I just decided to add the paint directly.
 
I forgot to take a photo at this point!! Whoops.


Once dry I used AAll & Create Stencil No 4 by the fabulous Fiona Paltridge.
I love that this has two options - for this layout I used the top section and some black gesso.
 
I love that using this technique kind of looks like the background is part of the painted section. A very cool effect.

 
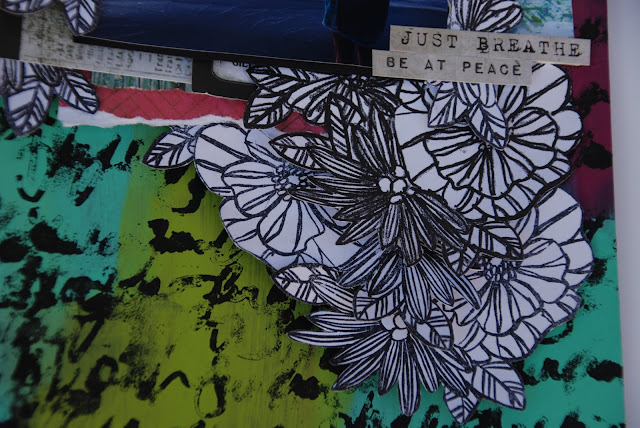
Next I stamped onto white cardstock using one of my favourite AAll & Create Stamps - No 20 using an Archival Black Ink.
 
I didn't worry too much if they didn't come out perfect, as I planned to cut them down anyway.
 
 
Next I cut them out.
 
Love the black and white - reckon it's gonna look pretty striking amongst the bold colours.


I then began layering behind my photos. I used lots of tags and paper from 7Dots Studio.
I also added in some 7Dots word stickers, cause really it wouldn't be a Tam page without them.
 
I stuck this down using foam tape as I knew I wanted to tuck my stamps in and around the layers.


I used foam tape on some of these too, just to give it a more layered look.


I really love how layering these stamps around the photo draws your eye to that point.


To finish it off, I added my title - I used Mambi Chips for this - I see Vicki has just restocked on them so I'm off to go shopping!!  I need more in my stash.
 
I hope this has inspired you AALL to go and CREATE!! (groan)
 
What do you plan to create with the Aall & Create produts - some tags? A layout? A few cards? A journal page?  Well whatever it is, I can't wait to see it.
 
Just head to our Scrap Matrix Shares Facebook Group and load it into the 'Aall & Create' Album, and let us know what Scrap Matrix Product/s you used.

That's it from me today.
 
Here's a list of the Scrap Matrix Products I used:
 
Black Bazzill
Tracy Scott Paper Artsy Paints
AAll & Create Stamp No 20
7Dots Word Stickers
7Dots Paint Chips 6x6 Paper Pad


Tuesday, 7 August 2018

My first August 2Crafty Chipboard Share

Hi creative souls, today I want to share my latest inspiration using 2Crafty Chipboard.
 
This one is called:

"#LAUGH"


A fun, silly layout that captures the essence of my family. 
 Love them to bits.


I used the following 2Crafty Chipboard on this layout:
 
"Crazy Stitched Panel"
"6 inch Revolution Frames"
"Doodled Arrows"
"Tiny Hearts & Stars"
"Mini #Word Set 2"


I began by adding white gesso to all of the chipboard, except for the title.
 
I then added colour using acrylic paints.


I painted two of the "Doodled Arrows" in blue.
 
I used my Prima watercolours to add the colour, available from Scrap Matrix. I used the 'Tropicals' range.
 
I then added them underneath the photos, I wanted them to look as though it was one arrow, rather than two joined together.
 
I also added some black ink to finish it off.


I added a combination of turquoise and green watercolour paint to the "Six inch Revolution Frames".
I love the two tone/ombre effect it gives.
 
I also added a touch of black ink.


I trimmed down the "Crazy Stitched Panel" and painted the segments in a pinky/red tone, again giving it a slightly ombre look.


I again added some black ink.
 
This really ties the layout together.
 
 
I added yellow paint to some of the "Tiny Hearts & Stars" and randomly placed these onto the layout.
 
Finally I added some black gesso to the "#LAUGH" from the "Mini #Word Set 2".
I placed this title onto the centre of the photos.
 
As usual you'll find lots of stickers and Tags from 7Dots Studio - Scrap Matrix has the full range.


I love the fun feel of this layout.
 
I think it works really well with the silly photos.


Have you scrapped some fun, silly photos lately?
 
I really hope this post inspires you to do so.


Friday, 3 August 2018

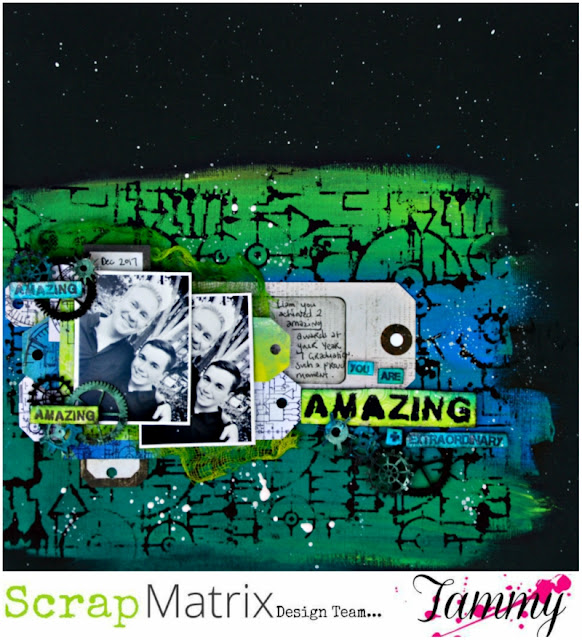
Aall & Create Challenge at Scrap Matrix includes VIDEO

Hi there creative souls. 
I've popped in today to share my latest for Scrap Matrix.
 
This month it's all about Aall & Create!! I adore their stencils and stamps so much, and use them on so many of my layouts.
 
For this layout, I used a stamp and stencil that I hadn't used before.

 
Yep I went with colour!! Surprise surprise!


I've created a video, so you can see how this layout came together.
 
I'll add the link below, but first, here's a few close ups!!
 

I created my own tags behind the photos by stamping onto some white cardstock, and also onto some papers I created using a Gel Plate (I made these ages ago and have been working my way through them.  I'm a big fan, and hoping to make a video next time I create some.)
 
I absolutely love how the stamps look behind the photos!!


They complement the background perfectly!


I painted them all in black gesso first, and then added some 'Patina Blue' Paint by Finnabair and some 'Aqua/Rose Opal Magic' to some of them.
I love how well they tie in with the stencilling and stamping.
So good for boy pages!!


I also added in some stamped words to the clusters of cogs.


My title was created with the Stencil and black gesso.


Here's the video......... Enjoy!!


I hope the video has inspired you.
I'd love you to subscribe to my YOU TUBE channel. I'm really hoping to create more videos soon.
 
I'd love you to enter this month - you can win not only a Scrap Matrix prize, but also the chance to  join us as a Guest Designer!!
How cool is that!
 
So get creating and then upload your creation using anything by Aall & Create to our Scrap Matrix Shares Page. 
Just pop it in the album marked 'Aall & Create'.
Easy Peasy.


Here's a list of the Scrap Matrix Products I used:
Raven Bazill
Dylusions Paint - London Blue
Finnabair Patina Paint - Blue