Wednesday, 21 February 2018

First Ranger share for Scrap Matrix

Hi all

Today I've popped in to share my first creation using Ranger products. for the current challenge over at my favourite scrappy store Scrap Matrix.


I absolutely adore Ranger products, and my absolute favourites are anything by Dina Wakley, and the awesome Dylusions products.

In my Design Team package I received the Dina Wakley Scribble Sticks, and I have to say at first they terrified me! I honestly didn't know where to start, and I put all this pressure on myself to be really arty with them.

Once I'd calmed down, I decided to just do what I know, stop feeling like I had to create an artistic masterpiece......so instead I decided to create a scrapbooking background and go from there.

Here's what I came up with......

 
Yep, see I used my favourite go to colours!
 
 
So I began by applying some white gesso to some black cardstock.

 
I swiped it where I wanted my colour to go.

 
Once dry I grabbed a few of the Scribble Sticks and began to simply colour these on quite randomly.
 
 
I then added some water and used a brush to disperse the colour, and also sprayed some water directly onto the background, letting it run down the page.
 
 
Pretty cool hey?
 
As I had so much colour and the black background, I decided my layout needed something fresh and white to make it 'pop'.
 
I stamped some of my favourite Dina Wakley stamps 'Abstract Blooms' onto white cardstock with Ranger Archival Ink, and then cut these out.


I then used the Scribble Sticks to colour  some guaze.


I coloured some white/cream flowers with Dylusions Ink Spray in Polished Jade and Fresh Lime.
 
 
I also used the Scribble Sticks to colour some smaller flowers
 
 
I then began to layer it all up.
 
I added a few 7Dots Studio tags behind my photo along with the guaze.
 
I then tucked in the stamped flowers and added the coloured flowers.
 
 
Inbetween these layers I tucked  some German Scrap.


For my title I used these chalkboard look stickers from 'Me and My Big Ideas'.


I also added a few of these randomly to my page for some extra journaling.
 
 
I poked some of these Crystal Stems into the clusters.
 
 
The final step was to flick some white gesso over the layout and swipe some around the edges.


I hope this has inspired you today.
 
I can't wait to see what you come up with for the Ranger Challenge.
The challenge runs until the 14th March and the only rules are that it must container Ranger products, and a few of those products must be available from Scrap Matrix.
 
How easy is that???
So get creating and then load your entry to the Scrap Matrix Shares Ranger Album.
Here is where you'll find it.
 
I'll pop back soon with another Ranger creation soon.
 
 
Scrap Matrix products used:
 
Black Bazzill
White Heavy Gesso
 

Thursday, 15 February 2018

Second Creation for 2Crafty Chipboard includes VIDEO tutorial

My second creation for 2Crafty Chipboard is called:

"Happiness is This"


I used the following 2Crafty Chipboard:
"Happiness is This title"
"Flower Doilies"
"Fine Leafy Bush"

 
A layout featuring myself and my beautiful girl at the beach, one of our happy places.
 
There are lots of goodies from Scrap Matrix on here too (of course!).
 
Tags, word stickers and stencil from 7Dots, Dylusions Spray Inks, and the background paper.


THIS place sure brings us happiness, so the title "Happiness is this" is just perfect.

I applied a few coats of white gesso to this, and then added emboss ink and some clear emboss powder. 

Love the gloss/resin finish this gives chipboard.


I also repeated this process on the "Fine Leafy Shrub", although I didn't apply my gesso evenly, as I wanted it to have a bit of a rustic, beachy feel.


 I trimmed down the "Fine Leafy Shrub" and poked the small clusters in and around my flowers.


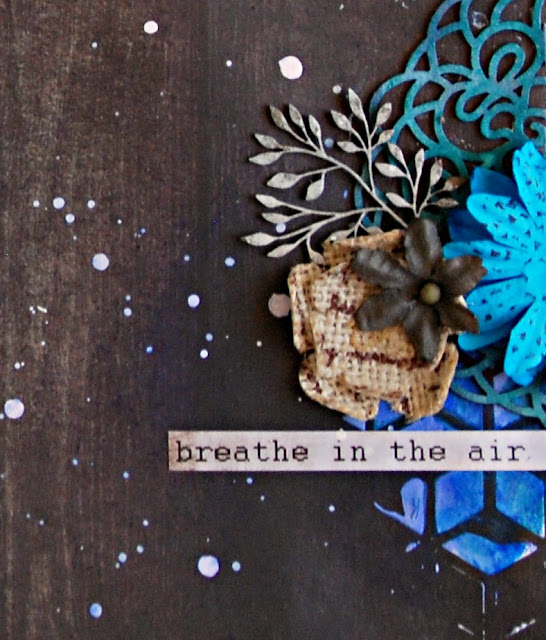
I applied white gesso to the "Flower Doilies" and then applied Distress Ink to get this gorgeous teal colour.


I trimmed the larger "Flower Doily" in half - giving me two doilies, which I strategically placed to look as though they were half off the layout.

This gives the layout movement, and draws the eye into the photo.


I love the teal, mixed with the blue, and the woodgrain.  It brings out the colour of the water in the photo.


I love how I can get such different effects on the chipboard. So versatile.

 
I have created a video, so you can watch exactly how this layout came together.
 
I hope you check it out!
 
I still can't work out how to get this to stretch across the screen, maybe one day!


 I hope this has inspired you today, thanks for popping in.


Tuesday, 13 February 2018

First February 2Crafty Chipboard Share

Tammy here today to share my first creation for  2Crafty Chipboard with you.
 
It's titled:

"Love this Life"


I used the following 2Crafty Chipboard:
 
"Fine Hearts Borders"
"Love this Life Title"
"Grid Panel"
"Film Strips Medium"


I used one of the papers and lots of the tags from the new 'Paint Chips' story from 7Dots Studio.  These are all available from my favourite scrappy store Scrap Matrix
 
 
I cut the 2 Crafty "Grid Panel" into pieces, applied a few coats of white gesso and then tucked them underneath my photo layers.


I also applied white gesso to the "Film Strips Medium"
 
I added a strip of this under my photo, and I also added a small piece to the left hand bottom corner of the layout.  This gives the layout some balance, and draws the eye into the photo.


I then added in the "Fine Hearts Borders".  Again some in the cluster at the bottom, and some behind the photo.
 
I added a few layers of Distress Ink to these until I was happy with the purplish hue I had created.


I love the "Love this Life" title.  Lol.
 
I love the two different fonts. To enhance this I decided to use two different Ink colours. 
I then added some embossing ink and some clear emboss powder.
 
I really love this effect.


I'm really happy with the colours in this one, I think they work perfectly with the photo.


Saturday, 3 February 2018

Guesting for CSI

Hi everyone

This month 2Crafty Chipboard is sponsoring CSI, which is such a cool challenge site.

I've actually never had a go at solving one of their cases, so I was keen to have a go.

I really enjoyed it.  I've always felt daunted by it all, but it actually was a lot of fun and not overwhelming at all.

I encourage you to have a go.


Here's a look at the challenge:
 
 
I solved Case 247 by taking inspiration from the above scene and also using some of the traditional clues.
 
I used the colours, in fact even how they were lined up!
I used a white background, florals, leaves, bird (flamingo) and rub-ons (these haven't had a workout in years so it was kinda cool to use these again).
I also documented a summer memory and used rhyming words in my title.


I used the following 2Crafty Chipboard:
"Summer Line Words"
"Alpha Set 1"
"6" Flamingo Frame Set"


I painted the Fun from "Alpha Set 1" black and did the same to the sun from the "Summer Line Words".
 

I used Distress Ink to colour the "6"Flamingo Frame" and I then applied embossing ink and clear emboss powder.


I loved using up some old bits and pieces from my stash.


Friday, 2 February 2018

Another holiday creation with Scrap Matrix

Hi all!
 
Happy to be back sharing another 'Holiday' Creation for Scrap Matrix.
I've created step by steps again so you can see exactly how I created this one.
 
I could do so many for this one. I think it's a time when we tend to take more snaps, but aren't that great at actually scrapping them and documenting the story.
 
Without further ado..... Here it is.....

 
A layout capturing our love of boogie boarding and wave chasing.
 
To go with the beachy vibe, I decided to use Kraft as my background. 
 
 
 I added heaps of woodgrain papers and tags to really give it that beachy feel, and teamed it with some painted stripes for a funky teen/surfy feel.
 
 
So let's get started on creating this one......
 
First up select your papers.  I chose Kraft, some 7Dots, Blue Fern and Pinkfresh.
 
 
I painted white vertical stripes onto the Kraft paper using Dylusions paint.
Don't overthink this part.....just do it!
 
I then added a few splatters.
 
 
I added some stamping using some of the new stamps from AALL & CREATE and black Staz-On.


I focused the stamping around the area that my cluster and photo would be.

 
I cut out some different woodgrains. 
These are all on the reverse side of the turquoise woodgrain paper which is a 7Dots Paper
Love it when a paper is so versatile.

 
I made sure with the layering that the 'Wild and Free' was visible. This was just too perfect for my photo.  I HAD to use it.  In fact, it makes a perfect title for the layout.
I then slipped in a few 7Dots tags.

 
I really liked the turquoise honeycomb sticker from the 7Dots sticker sheet. 
 
I liked it so much, I decided to cut some more in various sizes from my leftover pieces of paper.

 
I added these to my layout in a way that created movement across the layout.


To finish off this layout, I added a few flicks of Dylusions Spray Ink in Polished Jade (my favourite colour), some thread, some word stickers and a touch of journaling.


There's still a couple of weeks left to enter the Challenge over at Scrap Matrix.
 
You have until the 14th February to load your holiday creations into the album over at Scrap Matrix Shares, and remember to list the Scrap Matrix Products you used in the comments to be in the running for a voucher from the Store.
 
Here's a reminder of the Holiday Challenge Moodboard:


As the challenge is all about holidays - this can mean so many different things to different people.
It could be a recent Christmas page, a favourite holiday activity or destination, a tradition you celebrate, or, of course, a trip you have taken - or maybe just a memento from that special holiday...... Anything that evokes a memory of holidays.
 

I can't wait to see what you come up with.
 
 
Scrap Matrix Products used:
 
Kraft Paper