Sunday 27 October 2019

PROCESS VIDEO for 2Crafty Chipboard

Hi there creatives!

I'm here today to share my latest design for 2Crafty Chipboard...


"World Traveller"

A layout celebrating my gorgeous girl before she jumped on a plane to fly a million miles away for a month on her recent Science Scholarship Adventure!!
An amazing experience and moment in her life that I had to capture.


I've used watercolours and gone back to my brighter style.

I created a PROCESS VIDEO of this one, so you can watch it come together.
I hope you enjoy it...


I used the following 2Crafty Chipboard:

NEW "Charlotte's Flowers"
"World Traveller Title"
"Heidi's Vines"


As you can see in the video, I first coated all the chipboard pieces in white gesso.

To the "Heidi's Vines" I added watercolours.
I used a mix of greens for the foliage, and red and pink for the berries.
Once dry, I added white pen marks. 
I find this gives a more realistic, and less flat feel.


To the NEW "Charlottes Flowers", I added a blend of watercolours for a variegated look.
I then tucked these in amongst the clusters.
These new flowers are really fine and detailed. I love them and can see they will be making quite a few appearances in my creations.


As I'd used a lot of different colours, I decided to coat my "World Traveller title" in white acrylic paint as this would go with the fresh feel the layout has.


There you have it!
I really love using watercolours on my chippy as it gives it an arty, washy feel.


Bye for now!


Saturday 12 October 2019

Tracy Scott weekend in full swing!!!

Hi guys
Well we are in the midst of the much anticipated Tracy Scott weekend at Scrap Matrix!!
I have looked forward to this weekend for such a long time (since last time really!)
And today we are right in the middle of it!!!

Yesterday we began, with not one but two classes!
What a start to the weekend.....
Today we continue.

Amongst all this Tracy Mania, I am here to share a few Tracy projects....


 First up a layout, celebrating soccer and stepsons....

Whenever I think of Tracy, I think of flowers, one of my big loves!
But I wanted to push myself to use some Tracy products to create a 'boyish' layout....


So I dug out all the stamps that weren't flowers......
 lots of  Tracy's sets have some boyish elements.
Here's what I gathered up..


These came from two sets. ETS125 and ETS01.

I immediately noticed all the circular shapes which reminded me of some recent soccer photos that I took of my stepsons match.
So I went with blue and green to highlight the colours in the photos (think grass and sky) and his team colours.

I began by adding green paint to the background, fairly haphazardly.
I used Dina Wakley  Lime and Evergreen 


Once dry I added some Dina Wakley washi tape and then stamped a few of the circular stamps onto the background.


I then wanted to add blue. 
So I painted a stack of different shades of blue onto some cardstock.
I used Dina Wakley paint in Lapis, Ocean, plus I used some of the gorgeous blues from Art by Marlenes watercolour set in 'Whimsy and Bright'.


I then stamped some of the larger circular shapes onto them.


Time to cut them out.


I then added my photos to the layout, and added these around the photos.


I added in a couple of handmade tags (created with art foamies and paint).
I also added in some 7Dots word stickers and a Mambi Chip.

Finally I stamped the chevron arrow onto cardstock (from set ETS125) and cut them out,
adding them to the layout.


The final step was to add a border and a few scribbles using my Fudeball pen.


Ok onto my next creation....
a quick art journal page.


I used Tracy's Mandala stencil PS124 and stamp set ETS01 again and  ETS09.


I began by adding white gesso to my art journal, and then I added blue and lime paint to the background using the recycled packaging method.

Basically add a bit of paint, lots of water and then splodge it onto your background.
I used Paper Artsy Beach Hut and Sargasso.


I really love the effect of this.
I also added a few blobs with a paint brush and then sprayed with water, and let it run down the page.
This helps to create the drippy look.


I then added the stencil to the page, and using dry baby wipes, I rubbed paint through the stencil.

I then added some Tracy stamps to create my dreamcatcher tail, and joined them to the stencil with my fudeball pen.


I then added paint to the stamped images.

I also added a rough border and scribbles with my fudeball pen.
Finally a sticker from the Art by Marlene sticker pack and that's it!


This one really was super quick.

Ok, now this last piece, I wasn't going to share and I don't have many photos because it was a complete FAIL!!!!
So much so, that I walked away and went and did something else.
Then a few days later, I came back to it and felt like I had nothing to lose, so I'd just play and see what happened.

To my surprise I ended up loving it.
It was a frustrating process, but when it did happen - the moment it changed - well that was magic!!

So my point is don't discard, keep adding layers, keep experimenting.
You never know what's around the corner.

PLUS sometimes that mistake is a creative gift.  
You see you no longer care about what you are doing.
You have nothing to lose.
You can't stuff it up anymore than it is.
So there's an opportunity to NOT think, to not judge, to just play, to follow your intuition and just see what happens.
That, my friend, is true ART, true freedom....


Yep very aptly titled!!


Those butterflies were cut from an adult colouring book, as they remind me so much of  Tracy and some of her beautiful butterfly Stamps.
I haven't yet treated myself to those gorgeous stamps of hers but you will find them here.
ETS26.  (this may change tomorrow, lol)


I adhered them to the page with Matte Gel.


Sorry I don't have step by steps to show you but this time its more about the exercise, about just letting go, about finding that freedom.

I know I have rambled a bit today, but I'm blaming excitement and anticipation.
I've gotta go get ready for today's Tracy classes.....

Much love...
Tam
xxx

Paper Artsy Paint - Beach Hut, Slimed, Sargasso, Cerise, Banana, Lavender
Dina Wakley Paint - Black, Lime, Evergreen, Ocean
Mambi Chips

Monday 7 October 2019

A soft pastel layout for 2Crafty Chipboard

Hi there creative souls.
I'm here today to share my latest design for 2Crafty Chipboard:

"Friends"

For this layout, I wanted to steer away from my usual bright colours, and have a go at a more pastel colour palette.


I used the following 2Crafty Chipboard:

*NEW* "6" Floral Cluster Border"
"Lattice Leaves"
"Friends Loopy Font Title"
"Mini Branches"
"Polaroid Frames"


I firstly coated ALL pieces with white gesso.

I absolutely LOVE that NEW 6"Floral Cluster Border.
I couldn't wait to use it.
I coloured each flower individually with watercolour paint.
Once dry I added a few simple pen marks.


I just love the mottled look this technique creates.
Soft and lovely.

I did the same to the "Mini Branches"
I love the effect of the pen marks.
It gives them an arty/whimsical feel.


The "Polaroid Frame" was painted with a grey/silver watercolour and then swiped with white gesso.


I simply added white paint to the "Friends Loopy Title" and the "Lattice Leaves".
I wanted that fresh simplicity!


There you are, I hope you like this one.
It was fun to try something a little different.


I'll see you again soon.
xxx


Thursday 3 October 2019

A pair of bold, flamboyant birds.....

Hey there beautiful creatives.

I've popped in today sharing my latest Scrap Matrix creations.

What an EXCITING month!!
Not only do we have a very cool Tracy Scott Challenge.....but she's also teaching classes at a 3 day workshop at Scrap Matrix!!!!

We just love her to bits.
So what better way to celebrate her, then to make September ALL about her!!!

So, my turn to share my creations.
Lately, I've been playing around a bit, creating some watercolour animals.
I thought I'd incorporate some Tracy-ness into them.......


Yep two gorgeous colourful birds.
Take a closer look at their tails......all Tracy Stamps!!

So let's take a look at how they came to be.....

Let's start with that gorgeous Flamingo!
I named him Floyd.
Yep so funny right?? 
Pink Floyd!!!


I began by grabbing a sheet from my Art by Marlene Large Album.

I then loosely sketched Floyd in pencil.
And began the watercolour process....

On a side note, I've tried a few different papers for my watercolours. I love the Paper in the Art by Marlene Journals.  It's so thick and can handle a LOT of water)


Once dry, I got out a mix of Tracy Scott stamps....
I began to add them using a masking technique we learned last year at the Tracy Scott event.

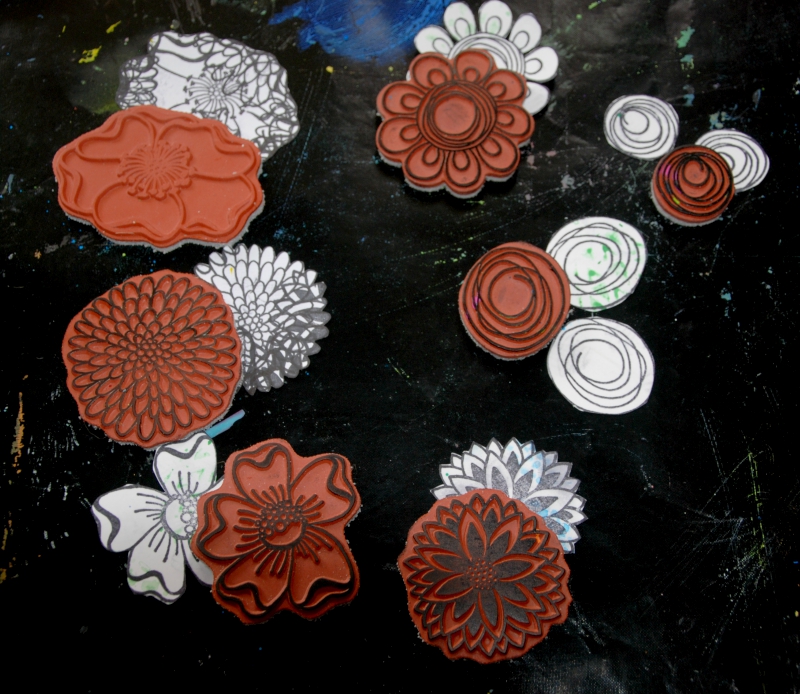
Stamp each of your flowers onto cardstock and then cut them out...


NEVER throw these away, these can be used over and over for many projects.

Begin by stamping your first flower, then cover it using the mask you have just cut out.
Line it up as best you can.
Then stamp your next flower. And repeat.
This pic shows the process....


Continue until you fill up his body.
You'll see mine aren't perfect.
That's ok.
They can be fixed up later....


Once they are all stamped, I then coloured them in with various watercolours.....
I also drew in any missing lines with my Fudeball pen and added some white Posca Pen too, just for a few highlights.


I then went in and added more depth of colour to Floyd.
I added fine details with pen and finished with lots of paint flicking!!


I really love it.
The flowers really suit his flamboyant style. (and those lashes!)

Ok, onto the second creation.....
Mr Peacock!!


I began by going through some of my older Tracy Scott stamps.
ETS09 is one of my faves that I come back to over and over.
I use the circles and flowers a lot, but thought it was time to look at those leafy sprigs....


Some see leafy stems, some see Peacock Feathers....or plumage!!

My favourite watercolours are Art by Marlene.
I've been using the 'Bold and Bright Set' for a while, but not long ago I got the 'Bright and Whimsy'.
Time to burst into the box.
It has some gorgeous blues, so  peacock is perfect!!


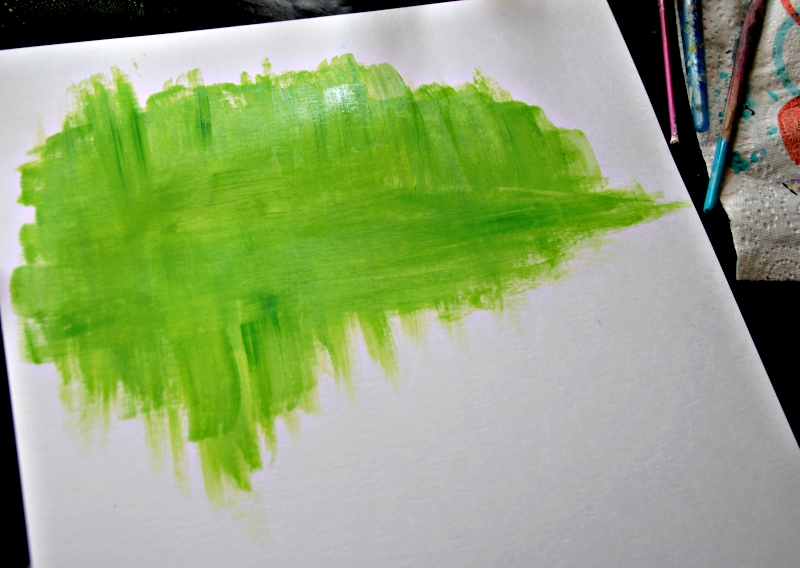
I began by sketching out and adding some base watercolours to the page.


Once dry, I began stamping on that glorious tail....
I then went in and filled in the details, with black pen.
Plus I added more colours and depth to Mr Peacock.


Finish with those flicks of paint.
The more flamboyant and bold....the better!

The only thing missing is a name....
It's a boy as the colourful peacocks are.
He needs something flashy and gorgeous and proud and proper.
I'd love you to let me know.

So that's it from me today.....
Two gorgeous hand painted birds, made extra special with Tracy Stamps.....


I'll be back again a bit later in the month.

Some of you I will be seeing soon at the Tracy Scott weekend!!
(Tracy included!! I can't wait to be inspired by my colour sister)
Woohoo!!!

Until then I ADORE seeing our Scrap Matrix Shares Page on Facebook filled with Tracy Inspiration.
What a month!!
What a girl!

Oh and just imagine how much Tracy Inspiration there will be AFTER the weekend!!!

xxx


Art by Marlene Watercolours Bold and Bright